
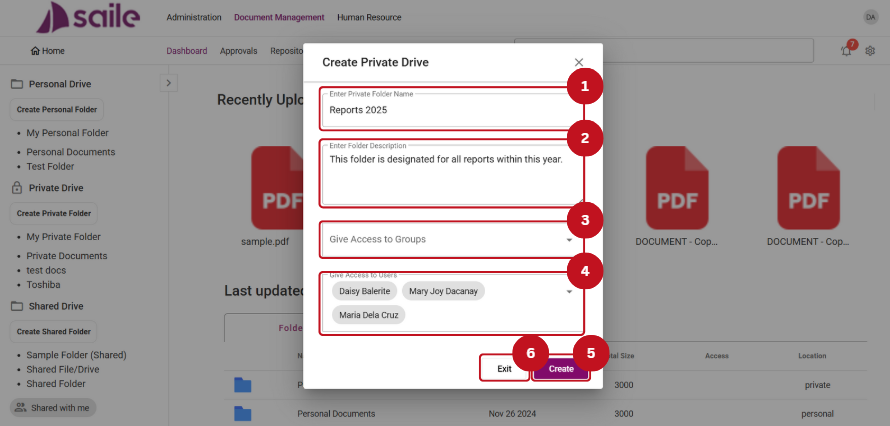
Private Drive
Creating Private Drive
- Click the Create Private Folder button.

2. Enter Private Folder Name (1), Enter Folder Description (2), Specify Access to Groups (3), and Grant Access to Users (4). Click the Create (5) button to create the folder, or click Exit (6) to close the window.
Creating Folders
- Click the Create Folder button.
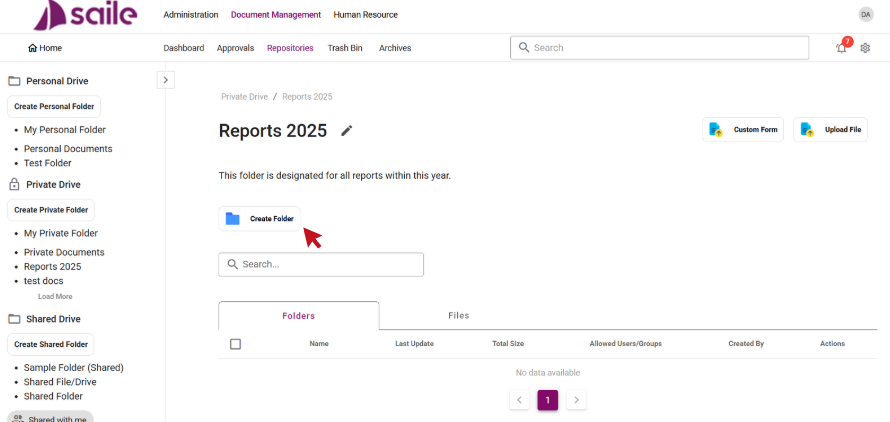
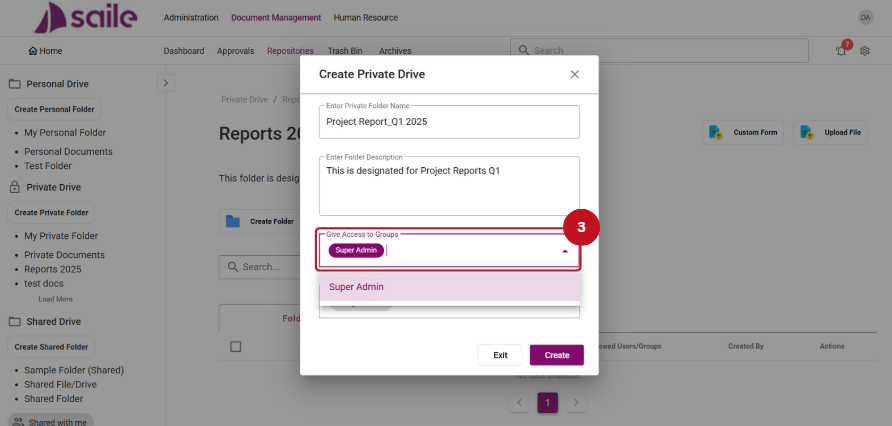
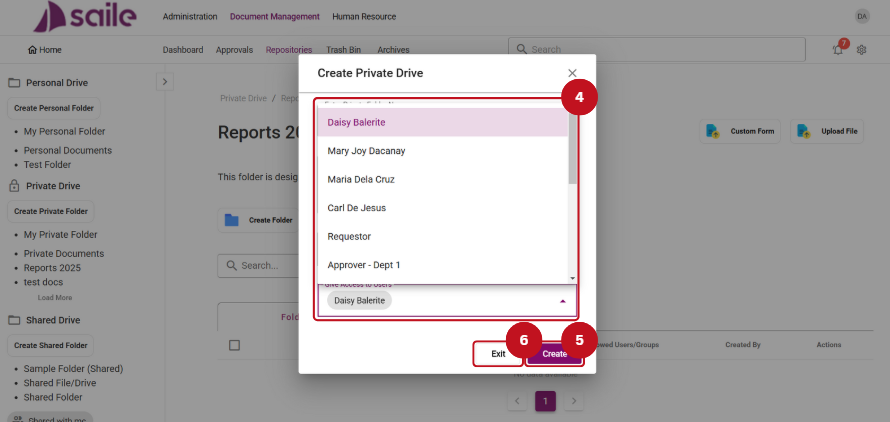
2. Enter the Private Folder Name (1), Folder Description (2), Grant Access to Groups (3), Grant Access to Users (4). Then, click the Create (5) button to create the folder, or click Exit (6) to close the window.

Folder Management Option
- The Edit option allows users to edit the Folder Name (1), Description (2), Grant access to Groups (3), and Grant access to Users (4). Then, click the Update (5) button to save the changes or click Exit (6) to close the window.

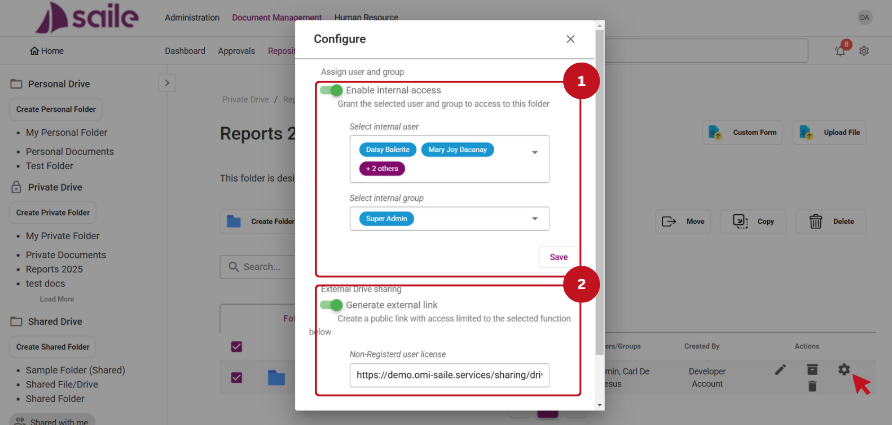
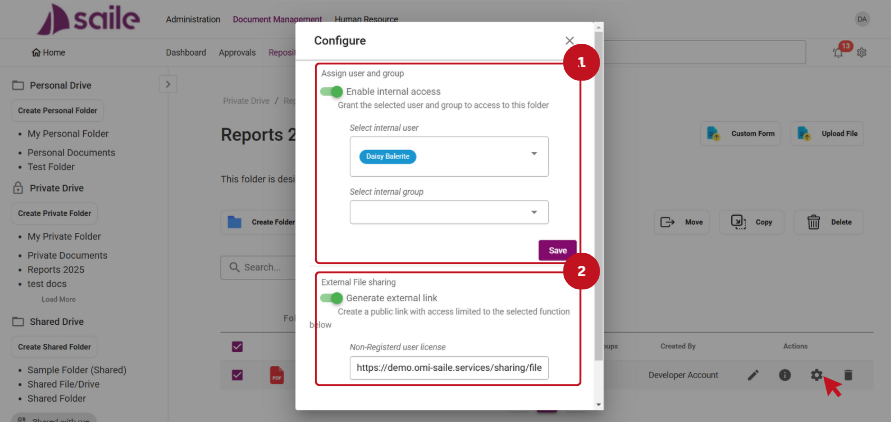
2. Click the Configure Option to Enable internal access (1) or Generate External Link (2).
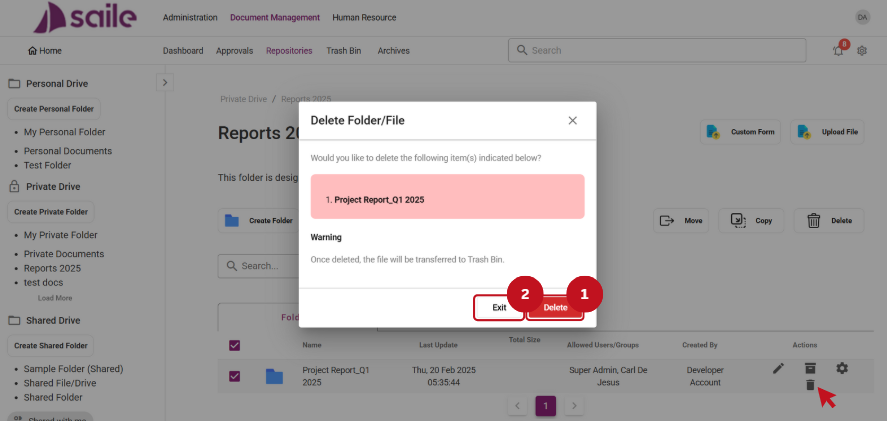
3. Click the Delete Option to remove the file. Then, click the Delete (1) button to confirm, or click the Exit (2) button to close the window.
4. Click the Archive Option to archive the file. Then, click the Yes (1) button to proceed or the Exit (2) button to close the window.

Creating Custom Form
- Click the Custom Form button.
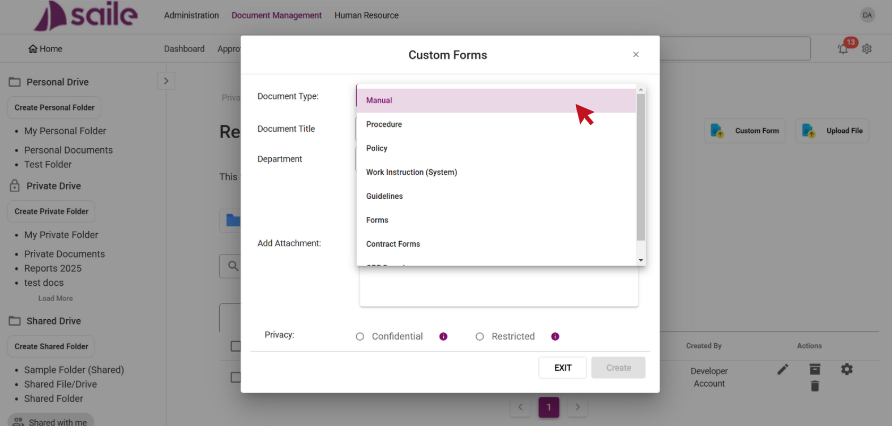
2. Select the Document Type.
3. Fill in the necessary details: enter the Document Title (1), Department (2), and add an Attachment (3). The Confidential (4) and Restricted (5) options , both under Privacy, to set access permissions. The “Confidential” option is intended for a specific user, while the “Restricted” option is meant for a group of users. Then, click Create (6) to create the custom form, or click Exit (7) to close the window.

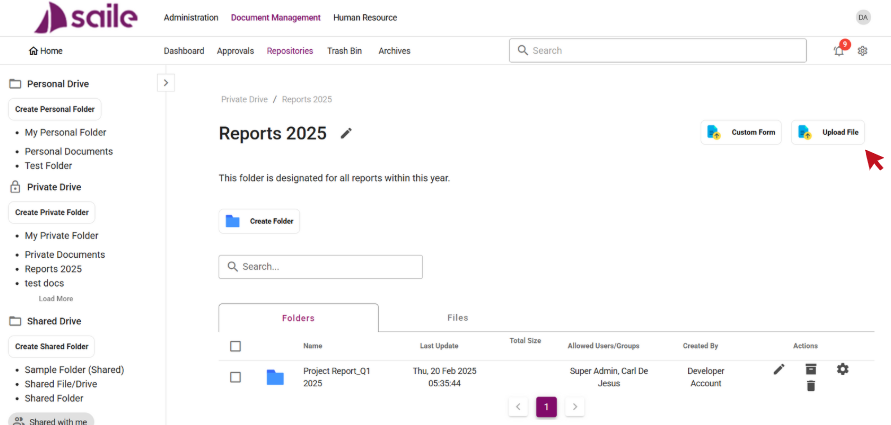
File Upload
- Click the Upload File button.
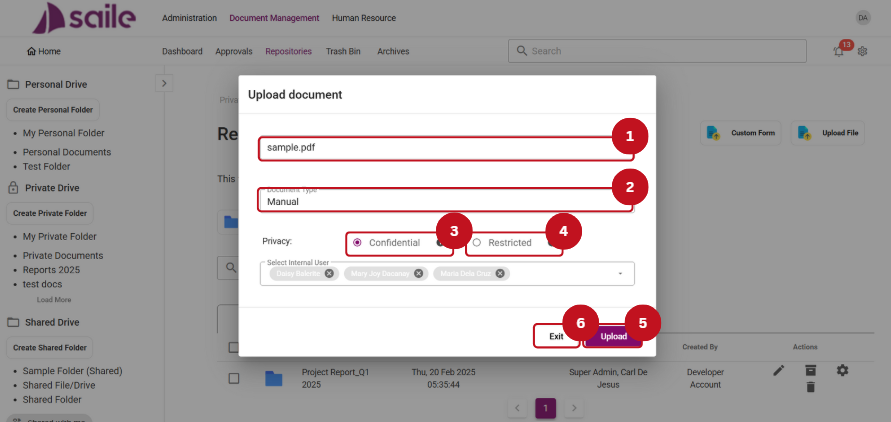
2. Select or drag the files into the Input field (1), then select the Document Type (2), and choose a Privacy option. Select Internal User for Confidential (3) or Internal Group for Restricted (4). Then, click the Upload (5) button to proceed or Exit (6) to close the window.
File Management Options
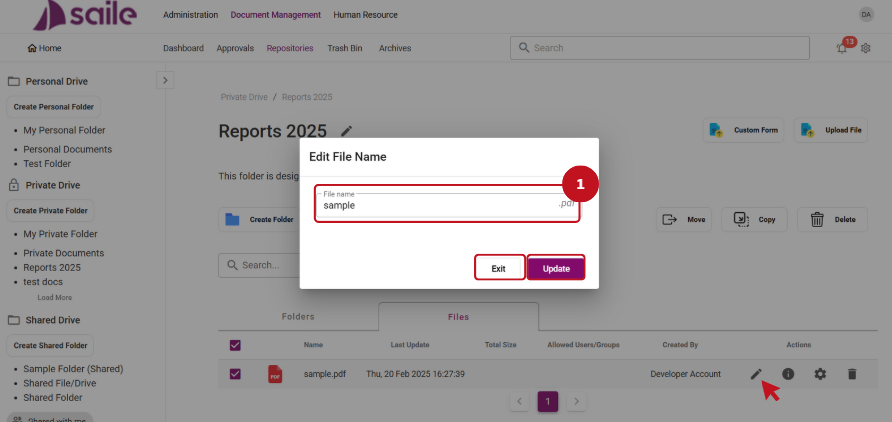
- Click the Edit Option to modify the title of the file.
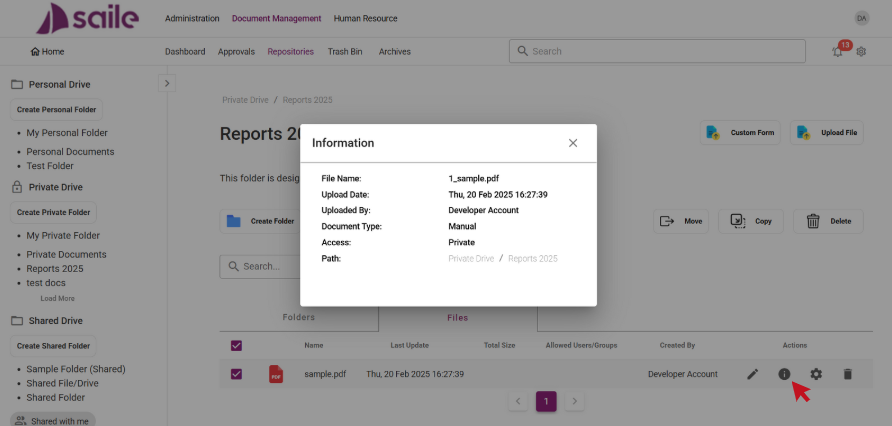
2. Click the Information Option to view the details of the file.
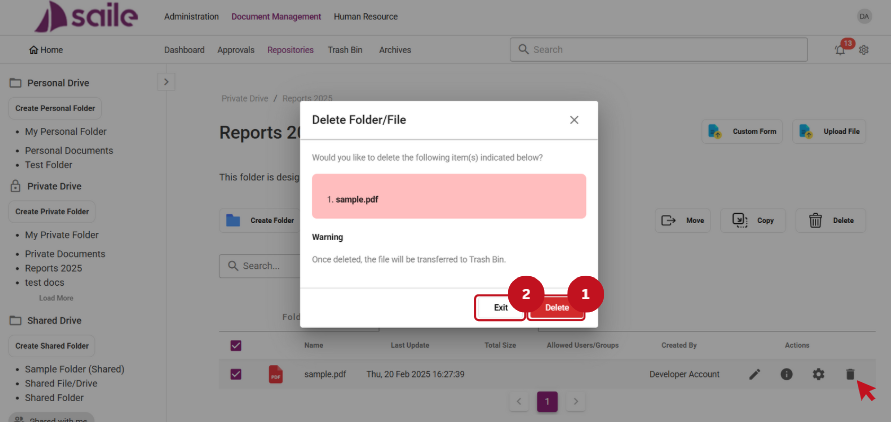
3. Click the Delete option to remove a file. Click the Delete (1) button to continue or click Exit (2) to close the window.
4. Click the Configure Option to Enable internal access (1) or Generate Internal Link (2).
29 Comments